header parallax image
  • Home
  • About
  • Blog
    • Watercolor ideas
    • Watercolor/Acrylic Technique
    • Demonstrations
  • Contact
  • Watercolors
  • Shop Prints
  • Original Paintings
  • Home
  • About
  • Blog
    • Watercolor ideas
    • Watercolor/Acrylic Technique
    • Demonstrations
  • Contact
  • Watercolors
  • Shop Prints
  • Original Paintings

How to Stop Watercolors from Drying Too Fast

April 2, 2025 April 2, 2025 dm

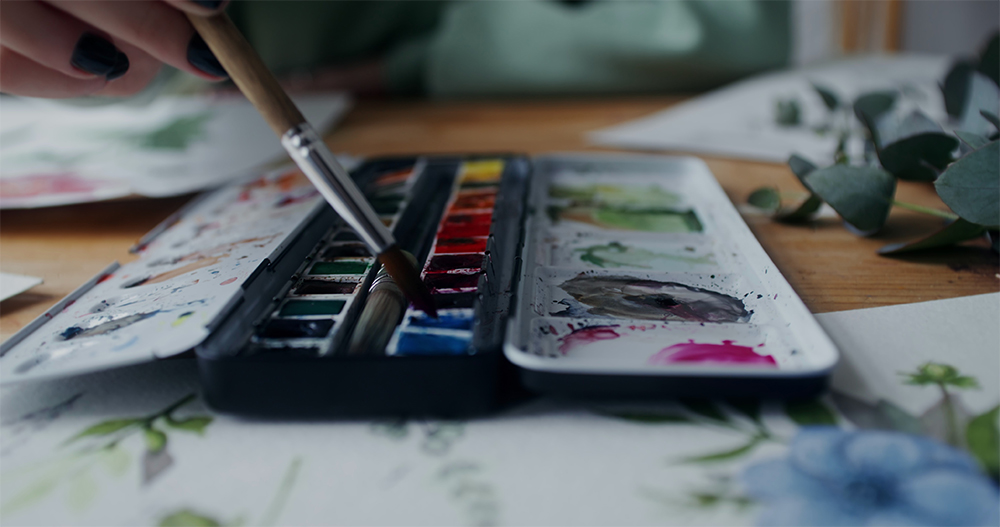
When painting with watercolor – as a beginner – it can be a struggle to get familiar with the technique to keep your medium from drying too quickly. When the paint dries fast it makes blending difficult and causes unwanted harsh edges. This can be especially frustrating in dry climates, warm rooms, or when working with certain types of paper. If you struggle with your watercolors drying too fast, here are some practical solutions to keep your paint wet for longer and improve your painting experience.

1. Adjust Your Environment

Control Temperature and Humidity

  • Increase humidity: Use a humidifier in your workspace to slow down drying time. A humidity level of around 50-60% is ideal for watercolor painting.
  • Lower the room temperature: Hot air speeds up evaporation, so keeping the room cooler can help.
  • Avoid direct sunlight and drafts: Painting near open windows, fans, or heaters can dry out your work faster than you’d like.

Use a Misting Spray Bottle

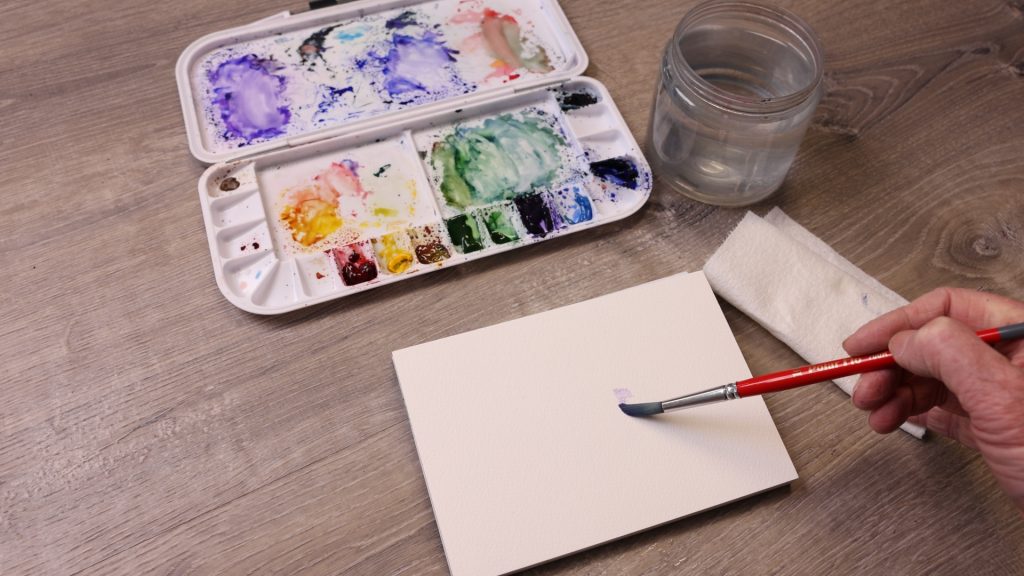
Lightly mist your palette, paper, or even the surrounding air with clean water to maintain moisture levels. A fine mist helps without making the paper too wet.

watercolor painting

2. Choose the Right Paper

Use a High-Quality, Heavier Paper

Thicker paper (140lb/300gsm or higher) absorbs water more slowly, giving you more working time. Cotton-based watercolor papers retain moisture better than wood pulp papers.

Pre-Wet Your Paper

For techniques like wet-on-wet, lightly dampen the paper with a sponge or spray bottle before applying paint. This allows for smoother blending and prevents quick drying. You can also wet the back of the paper or with heavier paper you can completely soak the paper then set it on your board to paint. 

3. Modify Your Painting Techniques

Work in Small Sections

Instead of trying to paint large areas at once, focus on smaller sections to maintain control over drying times.

Use More Water in Your Mix

Adding extra water to your paint keeps it fluid for longer. However, be careful not to over-dilute your colors.

Layer Strategically

Instead of applying thick paint all at once, use gradual layering to build color while keeping areas wet where needed.

4. Use the Right Paint and Palette

Choose Slow-Drying Paints

Some watercolor brands dry faster than others. Try using brands like Daniel Smith or Winsor & Newton, which tend to stay wet longer on the palette.

Use a Stay-Wet Palette

A stay-wet palette with a damp sponge or paper towel can help keep your paints moist for extended periods.

In conclusion

If your watercolors are drying too fast, adjusting your environment, choosing the right materials, and modifying your techniques can make a huge difference. Experiment with these tips and find what works best for your style and climate. With a little preparation, you’ll have more control over your painting process and achieve smoother, more blended results!

continue reading

Common Watercolor Mistakes and How to Fix Them

March 9, 2025 March 9, 2025 dm

1. Using Too Much Water

Watercolor mixing

The Mistake: Applying too much water can cause colors to bleed uncontrollably, making details difficult to maintain. It can also lead to warping of the paper.

How to Fix It: Use a quality watercolor paper that can handle water well. If you’ve already applied too much water, gently blot the excess with a dry brush or paper towel. To avoid this issue in the future, control your brush’s water load by dabbing it on a tissue before applying paint.

2. Creating Muddy Colors

The Mistake: Over-mixing colors or layering too many can result in dull, muddy tones instead of vibrant hues.

How to Fix It: Stick to mixing only two or three colors at a time. Avoid overworking the paint on the paper—let layers dry before adding more. Use a clean brush and fresh water when switching colors.

3. Overworking the Paper

The Mistake: Repeatedly brushing over the same area can damage the paper, causing it to pill or tear.

How to Fix It: Be patient with your layers. If you notice paper fibers lifting, stop immediately and allow the area to dry completely before making further adjustments. Using high-quality cotton paper can also help prevent damage.

4. Uneven or Harsh Edges

The Mistake: Sometimes, watercolors dry with unwanted hard edges, disrupting the flow of a painting.

How to Fix It: While the paint is still damp, use a clean, damp brush to soften the edges. If the paint has already dried, try lightly re-wetting the area and blending it out.

5. Colors Drying Lighter Than Expected

The Mistake: Watercolor paints tend to dry lighter than they appear when wet, leading to less intensity in your painting.

How to Fix It: Adjust by making your initial mix slightly darker than you think you need. Layering glazes can also help deepen colors without making them muddy.

6. Unintended Backruns (Blooms)

The Mistake: Adding too much water to a partially dried area can cause blooms or cauliflower-like patterns.

How to Fix It: To fix an unwanted bloom, you can try lifting the excess pigment with a dry brush. To prevent blooms, wait for one layer to dry completely before adding more paint.

7. Skipping the Planning Stage

The Mistake: Jumping into a painting without a plan can lead to composition issues or unintentional mistakes.

How to Fix It: Lightly sketch your composition before painting and test colors on scrap paper to ensure they work well together. Having a rough roadmap will help guide your painting process.

Conclusion

Mistakes are a natural part of learning watercolor painting. The key is to understand how to fix them and how to avoid them in the future. By practicing these corrective techniques, you’ll gain more control over your work and develop a better understanding of how watercolors behave. Happy painting!

continue reading

How to Achieve Vibrant Colors with Watercolor

March 5, 2025 April 1, 2025 dm

Watercolors are often associated with soft,  romantic effects, but achieving vibrant, bold colors can be a challenge. If your paintings tend to dry duller than expected, these key techniques will help you maintain rich and lively hues.

1. Use High-Quality Pigments

The quality of your watercolor paint plays a crucial role in vibrancy. I tend to use the Windsor-Newton professional brands but you can use others lid Daniel Smith. The professional-grade paints tend to contain a higher pigment concentration and fewer fillers, resulting in more intense colors. Look for single-pigment paints, as they mix more cleanly and retain their brightness.

2. Choose the Right Paper

Watercolor paper absorbs and reflects pigments differently. Use 100% cotton paper with a good weight (at least 140 lb/300 gsm) to maintain color richness. Rough or cold-pressed paper enhances texture, while hot-pressed paper provides smoother, more controlled color application. One of my favorites is a 300 lb cold press paper sheet cut to size. It tends not to buckle when wet unlike lighter papers. Try out different weights and brands to get the paper that gives you the results you’re after. 

3. Control Your Water Usage

While water is essential in watercolor painting, excessive dilution can weaken color intensity. To maintain vibrancy, use less water when mixing pigments and apply richer, more concentrated washes where needed. Watercolors tend to dry lighter than they appear when wet which brings me to my next point.

4. Layer Strategically

Building up layers enhances depth and richness. Apply light washes first and let them dry completely before adding subsequent layers. Glazing (layering transparent washes) can amplify color intensity without muddying the hues.

5. Avoid Over-Mixing Colors

Over-mixed colors can become dull and lifeless. Stick to a limited palette and allow colors to mix naturally on the paper for a more dynamic and fresh look. Understanding color theory will also help in creating harmonious yet vibrant compositions. Learn to be aware of how colors mix and how to control the mixing process whether on the palette or paper. One challenge that I’ve tried to grasp is mixing colorful skies. Keeping the sky blues separate from the yellow sunset glows is a trick! I’ve learned to transition from yellow to red, to blue to avoid getting a green sky. 

6. Take it Slow

Placing a color where you want and letting it dry before painting an adjacent color will keep the colors from accidentally blending. Also test what colors are painted next to each other. A color can change vibrancy when surrounded by different colors. 

7. Embrace Contrast and Value

Vibrancy is not just about color but also contrast. Utilize strong darks to make bright colors pop. Understanding values and leaving areas of pure color unmuted by excessive blending can enhance visual impact.

8. Let the White of the Paper Shine

Unlike other mediums, watercolor relies on the paper’s white surface for highlights. Preserve whites by planning negative spaces, using masking fluid, or lifting paint while it’s still wet. 

9. Avoid Overworking Your Painting

Repeated brushstrokes can disturb pigment and create muddy effects. Work with a light touch, allowing colors to blend naturally without excessive manipulation.

10. Test Colors Before Applying

Before committing to a wash, swatch your colors on scrap paper. This helps anticipate how they will dry and ensures you achieve the intensity you want.

Final Thoughts

Achieving vibrant watercolor paintings takes practice, but with the right materials, techniques, and understanding of color interactions, you can create bold and dynamic works. I’ve found that watercolors can have a life of their own but with practice you can start to get more control and come out with vibrant paintings!

continue reading

How to Mix Watercolor Paint to Make Black

February 2, 2025 February 2, 2025 dm

Mixing your own black watercolor paint can add depth and vibrancy to your artwork compared to using pre-made black paints. Creating black from primary colors allows for more variation and control over the shade. In this post, we’ll explore different methods to mix a rich and dynamic black using watercolors.

Why Mix Your Own Black? Many artists avoid pre-made black watercolor because it can appear flat and lifeless. By mixing your own black, you can create a more natural and harmonious tone that complements the rest of your painting. Plus, different pigment combinations allow for subtle variations in temperature and undertones.

Primary Colors Method One of the best ways to mix black is by using the three primary colors: red, blue, and yellow. Here’s how:

  • Start with equal parts of a warm red (such as Alizarin Crimson or Burnt Sienna) and a deep blue (such as Ultramarine or Phthalo Blue).
  • Gradually add a dark yellow (such as Burnt Umber or Yellow Ochre) to balance the mix.
  • Adjust the ratio to achieve the desired shade of black. More blue will create a cooler black, while more red or yellow can warm it up.

Complementary Colors Method Mixing two complementary colors—colors opposite each other on the color wheel—can also produce black. Try these combinations:

  • Blue and orange (Ultramarine Blue + Burnt Sienna)
  • Red and green (Crimson + Phthalo Green)
  • Purple and yellow (Dioxazine Purple + Yellow Ochre) Each combination creates a unique, rich black with underlying tones that can enhance your painting.

Layering for Depth Instead of mixing colors on the palette, you can also layer washes of complementary colors directly on the paper. This technique gives a more complex and textured black, which can be useful for shadows and depth.

Experiment and Explore Every watercolor brand and pigment behaves differently, so take time to experiment with different combinations. Swatch your mixtures and test them in different lighting to see how they interact on paper. The paints that I’m using are from Windsor-Newton.

For a video on the process of mixing watercolor paint to make black click here.

Conclusion Mixing your own black watercolor allows for greater artistic control and depth in your work. Whether using primary colors, complementary pairs, or layering, you can achieve a variety of black shades suited to your painting’s needs. Experiment, have fun, and enjoy the creative process!

continue reading

Why I can’t Draw or Paint

December 17, 2022 December 17, 2022 dm

Early creative development

It could be that you’re struggling with the “I can’t Draw or Paint” myth simply because of your environment when you were young. When you’re first picking up a crayon as a child, there aren’t many inhibitions. You can scribble till your heart’s content! As you get older you start to tune in to the feedback that you get from your drawings. Did you get complimented? Did a parent scoop it up and throw it in the trash? Did you or how did you get corrected or encouraged?

Moving into school, your peers and teachers play a huge role in encouraging your creative juices. You also may be comparing yourself to others around you – thinking that their drawings or paintings are so much better. So what do you do or did you do about it? That leads us to the whole genetics.

Genetics

There’s no getting around it – people are made up of different stuff. You have your socialites, your talkers, your introverts, creatives, etc.

Because of how we’re built and our brain chemistry some are just naturally better at the creative side. So what can be done about it?

Solutions to the “why I can’t paint” problem:

Stop comparing yourself to others

The imposter syndrome is real! That inner voice keeps saying, “I’m no good at drawing and painting”. Stop listening and push through the resistance to stop drawing! Someone is always going to be better than you and I. Use yourself as a guide – do you see improvement in your drawings and paintings over time? Some of the most famous paintings are some that I scratch my head over wondering who would want that hanging on their wall – did someone say “The Scream“?. Painting and drawing is an expression of yourself, your feelings, and your interpretation of the world around you. Relax, have fun and express yourself the way you want through your paintings and drawings.

Practice drawing and painting exercises.

La Lavande - lavender acrylic painting
La Lavande – Acrylic on canvas done while on the phone!

There are lots of steps you can take to improve drawing technique and to get your brain to think in a different way. You can try to flip a reference image upside down and think more about the shapes and placement in a new way. You can listen to music or have a conversation with someone while working to take your mind off of the details that might hang you up. One of my best acrylic paintings was done while talking to my creative daughter on the phone. I felt like my mind was in a little different place and I was happily surprised with the results! Call it “distracted painting” if you will!

Join a Group

Painting with others can help to spur you on to keep at it. You can pick up tips and tricks from others. It can put your painting and drawing exercises on a regular schedule rather than just when you get around to it. Just being with the right group can make your painting time fun.

Keep it Simple

Don’t try to do a masterpiece all at once. Do mini painting sessions on smaller sheets of paper or canvas. Do a small study – a part of what might be in a larger painting. For instance practice drawing a tree shape, a small reflective pool, an apple, etc. Also keep your painting tools handy. If you have to go through an entire process to get started you may not do it.

– So, let me know what you think! Are you seeing improvement in your paintings over time? Are you blocking out the imposter in you? Let’s get painting and drawing!

continue reading

How to Paint Water Droplets in Watercolor

December 13, 2022 December 13, 2022 dm

It’s good to know how to paint water droplets since they’re found on all sorts of surfaces from leaves with morning dew to ice cold beverage containers to window panes on rainy days. Adding water droplets to leaves, window panes can add that mood to your watercolor painting.

I find that by doing these little mini studies or practice sessions, it helps with doing a full scale painting as they can be done quickly. At the same time I can develop better skills. 

So, on to the painting….First let’s take a look at a couple of reference photos. If you look closely you’ll see that most of the time the darker part of the droplet is closest to the light source and the lightest part is opposite the source. Also, unlike solid shapes, droplets are translucent so you can usually see some of the underlying background texture and color. 

painting watercolor droplet
Painting Watercolor Droplet Reference Photo by Doug Moore

What the droplet does is it acts like a magnifier so it distorts the background. Depending on the light source and the objects around it, you’ll see reflections on the surface. 

Similar to solids you’ll want to pay attention to the cast shadow on the opposite side of the droplet.  

Alright, let’s get going. I’m going to be painting watercolor water droplets on a leaf like you’d see with early morning dew or after a rain shower. I’m going to outline all of my shapes lightly with a graphite pencil then apply the masking fluid.

watercolor water droplet sketch
Water droplet sketch

There are a couple of ways you can ‘sell’ the fact that these are water droplets. One is to make a distinct outline and contrast to the shape. The cast shadow gives the droplet the illusion of dimension. The other is retaining or adding reflections on the surface. You’ll notice the reflections on the surface of this large droplet. Enlarged you can almost see my camera and tripod!

watercolor water droplet masking fluid
Masking fluid for water droplet highlights

There are a couple of ways to get that bright white reflection that dots the surface of the droplet. If you’re a watercolor purist, you can use masking fluid to later reveal the white paper. The other method is to go back over the finished painting with a white gel pen or gouache. In this case, I used a masking pen which to be honest it would be better to use a brush on masking fluid. Because it’s so thin, I had trouble removing it in places and had to resort to scraping it with a knife blade.

I also used a white gel pen to really get the highlights, but that’s not neccessary – just helpful! If you’re a purist just skip that step.

The masking fluid goes on those little spots where the final reflections are. The fluid needs to dry completely – you can use a hair dryer on low setting or just let it air dry. While it’s drying I’m going to start working on the leaf background. Paint around the droplets so that you keep a lot of contrast. You can always go into each droplet and add more tone later.  

painting the background around the water drops

Once the background is dry it’s time to start defining the drop. I’m using a darker, opaque color for the outline. I’ll add a little bit of a different mix for the shadow inside the droplet. With some of the color blend it in with a damp brush to keep that rounded shape and have the background color come through. 

Watercolor painting the inside of the water drop
Painting the cooler shadow area and inside the water drop

Let that dry a bit before moving on to the cast shadow. Keep in mind that shadows are usually darker and more defined the closer they are to the object and as they move out they blend more with the background and get softer.  

The final step is to define the edges a little more and add some detail into the background. For the background behind the leaves I went with a warmer and darker color to contrast the cool green leaves. Some of those background details can be brought into the water droplet, refracting it slightly. Think about what reflections could be on the mirrored surface of the water drop. 

Defined watercolor water droplet
Close up of the water drop and ready for final steps

Once it’s all dry I’m going to remove the masking fluid. 

There! That completes the watercolor droplet painting. I hope you enjoyed this try it on your own! If you have some tips of your own for painting droplets in watercolor send me a message. I’d love to hear from you!

Completed watercolor droplets
Final water droplet practice watercolor painting

continue reading

Painting Sky Transitions with Acrylic Paints

December 8, 2022 December 17, 2022 dm

When I talk about sky transitions with acrylic paints, I’m talking about moving from one color to another to make either a life-like or dramatic sky effect. 

Rarely in nature do we see a flat, single color sky. A beginner mistake is to pick a blue color and paint the entire sky with that one blue color. If you look carefully at the sky or reference photos you’ll see that the color usually gradiates from top to bottom and left to right depending on the time of year and the time of day. There are so many colors that can go into a sky painting – grays, shades of blue, oranges, and yellows. Also, clouds come into the picture and can make the skies even more dramatic. Painting a dynamic sky can breathe life into your watercolor, acrylic, or oil painting.

sky transition photo for acrylic painting
Photo example of daytime sky transition from blue to gray

We’re going to look at different skies, talk about what makes them unique, and translate that look and feeling onto paper or canvas. I’m not going to be as concerned with the clouds that make up the sky but rather with the change in color from one area to the next. 

Whether you’re using watercolor, acrylic, or oil, the same thought has to be given as to how to transition from one color to the other. 

Keep it clean

Keep two containers of water around to rinse off your brushes. Before attempting to blend the sky colors, make sure you first rinse in your dirtier water, then in the fresh water. Wipe on a cloth and make sure there aren’t any leftover bits of color in the brush before blending. 

Also, make sure you don’t accidentally pick up any stray colors from your palette. The tiniest bit of blue paint on your orange sunset will turn it green!

sunset sky painting example
Photo example of sky colors

Use a large brush

A small brush has it’s place but unless you’re working on clouds, reach for your large, flat brush. There’s nothing like a larger brush to lay the paint on quickly and smoothly, avoiding brush strokes. 

Thin your paint

Some artists use texture when painting skies and blending sky colors but if that’s not your intent thin your paint a little. You can use a bit of water or even better use an acrylic flow aid like this one for acrylic paints.

Transition to light or gray

Avoid the unwanted mixing to green when painting a sunrise or sunset by using a transition color of light gray or warm white. Changing abruptly from blue to orange or yellow will probably give you unwanted results. Instead, brush out the blue to almost no color, then work the sunset color up to the light gray or white.

A note on watercolor: Let the base layer dry before applying the other color. This way you have less chance of the two colors bleeding together.

Acrylic painting sunset to blue transition
Use a light transition color for sunset and sunrise paintings

Where I live in Maine, we have long summer days where the sun is high in the sky and takes a long arc across the sky. In the winter, the sun is much lower, the days are shorter and there are some wide varieties of color ranging from deep blue to bright pinks and oranges. The more I paint skies, the more I look at them in real life and imagine what paint mixes I’d use to replicate it.

What are your techniques for painting skies with their color transitions? Drop me a line!

continue reading

8 Beginner Watercolor Tips

February 10, 2018 December 8, 2022 dm

It’s never easy starting out on a new venture. We know more that we did last year and there’ll be more to learn as we go on this journey!

Here are a 8 watercolor tips for beginning watercolor artists. Hopefully you can learn from my mistakes.

1. Plan your project.

This could be an entire post on it’s own but here are the basics. Take a look at your photograph or whatever you’re using as a reference and think about how the composition will be on your paper. Take a look at the ‘rule of thirds’ for starters. What do you want the focal point to be? 

Plan out your palette. What colors and combinations will you be using? Have your paint, water, and towel laid out on the correct side – depending on whether you’re right handed or left. You don’t want to be reaching across your work with a dripping brush!

Do a sketch of your composition on some scrap paper or a journal so you know how the various tones will be. Then get a light sketch ready on your working paper. 

2. Don’t outline your shapes with paint

Start at one side of a shape or sky, or mountain and bring your paint down to fill the shape with your brush. If you outline the brush stroke may dry and leave a line when you come back to fill the rest of it with color. 

3. Use the right amount of water for the effect you want

This is watercolor so use that water! Generally a dry brush on dry paper (dry on dry) is reserved for certain textures. Most of the time you’ll need to pre-wet the paper and then use a watery paint mixture. Get to know when the right time is to start putting the paint down. This takes practice! (more on that later)

The flip side to this is getting in a rush and going over your wet paper before it’s ready. If you do this you may get lighter than desired color and the paint may ‘bloom’ in a way that you don’t want. 

4. Don’t overwork your painting

Ok, I’m preaching to myself here! The temptation is to keep applying colors and going over and over your work. Be intentional about what you’re doing and then leave the layer to dry. Also, don’t use too many colors. Try to stick to a simple palette (3 max).  After you gain some experience you can get some amazing detail by working slowly in layers, letting each one dry before applying the next. (see Anna Mason Art for an example!)

5. Start ‘loose’

One of the beauties of watercolor is it’s transparent, flowing look compared to other paint mediums. Don’t get stuck in the details when you’re starting out. Plan what you can and let the watercolor do the rest. Let your initial paintings have a misty look. After it dries you can always go back and add more detail to your primary subect. 

6. Use a wide variety of tones in your painting

You can really direct the viewer’s eye by using tone in the right way. Leave your background light and darken your subject with multiple layers. Or do the reverse . Using different tonal values will give your watercolor painting a lot more interest. One exercise is to use only one color paint for your entire painting. Then you don’t need to think about color combinations and you can focus more on the tonal value. (see my video on monochromatic painting)  

7. Let whites be white

This goes back to planning your watercolor painting. Most watercolor artists leave the white of the paper for their white color. You can also mask areas that you want white then remove the mask or scrape the color when dry to reveal white paper.  There are also some watercolor whites that can be used but this isn’t as common as just leaving your paper white. 

8. Finally, as promised – practice

There’s nothing that will move you along faster as a watercolor artist as practice. This may mean setting aside a specific time every day or two to actual make mistakes and learn a better way! 

It also helps to keep an area set up for your work. Make it comfortable – have good lighting, put on some of your favorite music, and shut off the interruptions (did I say cell phone?) !

Soon you’ll be seeing positive results out of your dedicated practice.

Happy painting!

continue reading

Rowboat in the water with broken oar

February 10, 2018 December 7, 2022 dm

On a trip to the Maine coast this past summer, I captured a photo of this rowboat splashing around in the water. I was drawn to the color of the boat offset by the dark water. Also it was evident that the boat hadn’t been used in a bit by the brackish water in the bottom it.

After sitting down to do the watercolor, I noticed that one of the oars had broken off. This added all the more to the story!

I was happy with the coloring and visual movement of the water. Please feel free to watch the video that’s been sped up and shortened considerably from the actual painting.

continue reading

How-to monochromatic painting

January 28, 2018 December 7, 2022 dm

Working with one color in a monochromatic painting is a great way to work on a project without getting caught up in the confusing world of mixing watercolor paint.

Here’s the video that I did to outline my process in doing the painting. I hope you enjoy! Please subscribe to my YouTube channel for more like this!

continue reading
1 2
Page 1 of 2

Search

About This Site

Find tutorials and demonstrations of watercolor and acrylic painting here.

Other resources related to the artist and artistic promotion will be posted as they become available.

Blog Posts

  • Demonstrations
  • Uncategorized
  • Watercolor ideas
  • Watercolor/Acrylic Technique

Newsletter

About This Site

Doug Moore has been practicing the art of watercolor for several years. Recently he has picked up the pace and has done more paintings and videos to show the process and teach others what he knows.

His philosophy is that he’s always learning but can always have something to share.

Search

site by maine graphics