It’s good to know how to paint water droplets since they’re found on all sorts of surfaces from leaves with morning dew to ice cold beverage containers to window panes on rainy days. Adding water droplets to leaves, window panes can add that mood to your watercolor painting.
I find that by doing these little mini studies or practice sessions, it helps with doing a full scale painting as they can be done quickly. At the same time I can develop better skills.
So, on to the painting….First let’s take a look at a couple of reference photos. If you look closely you’ll see that most of the time the darker part of the droplet is closest to the light source and the lightest part is opposite the source. Also, unlike solid shapes, droplets are translucent so you can usually see some of the underlying background texture and color.
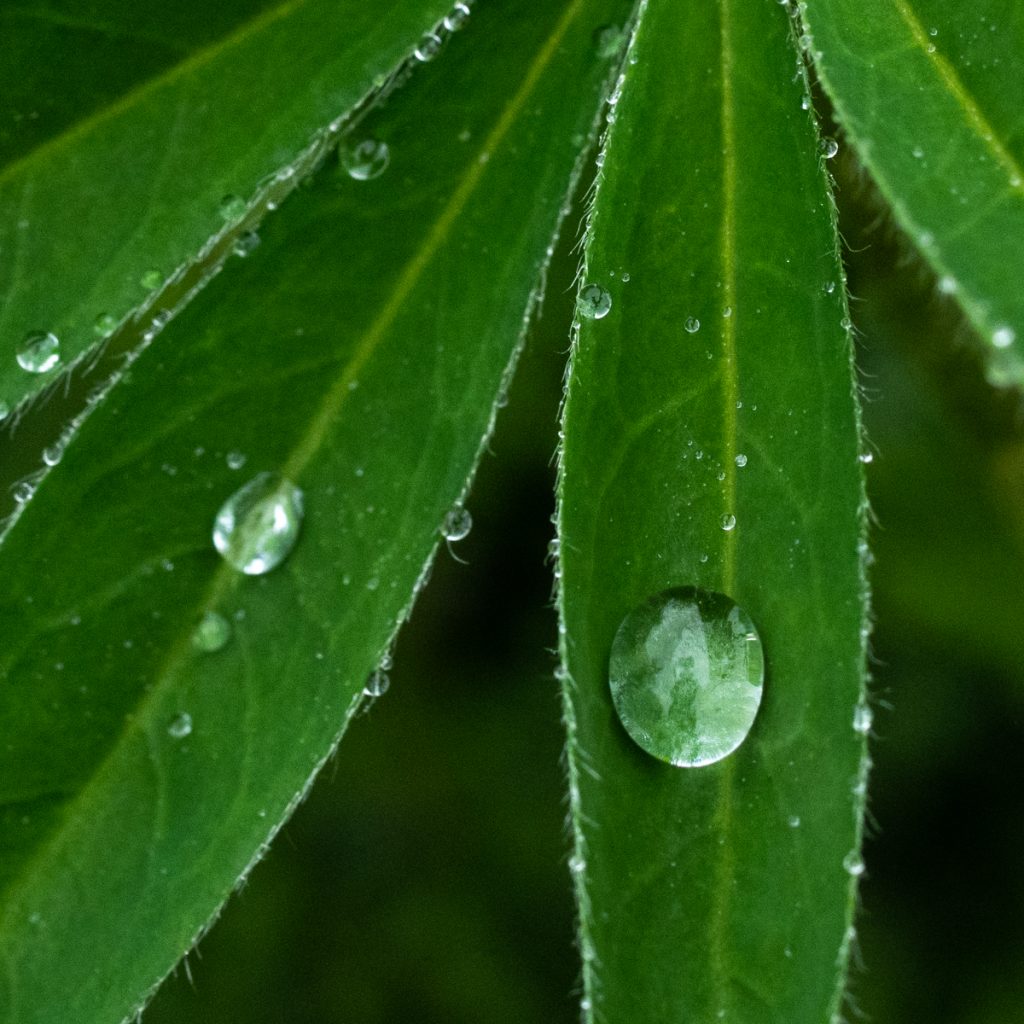
What the droplet does is it acts like a magnifier so it distorts the background. Depending on the light source and the objects around it, you’ll see reflections on the surface.
Similar to solids you’ll want to pay attention to the cast shadow on the opposite side of the droplet.
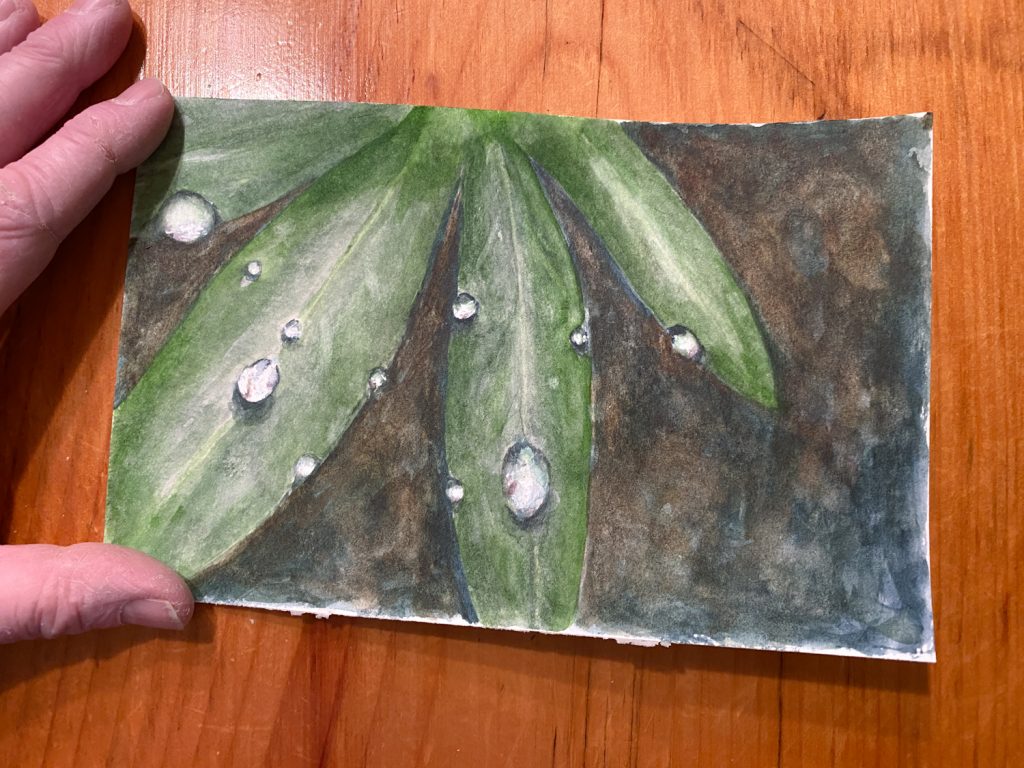
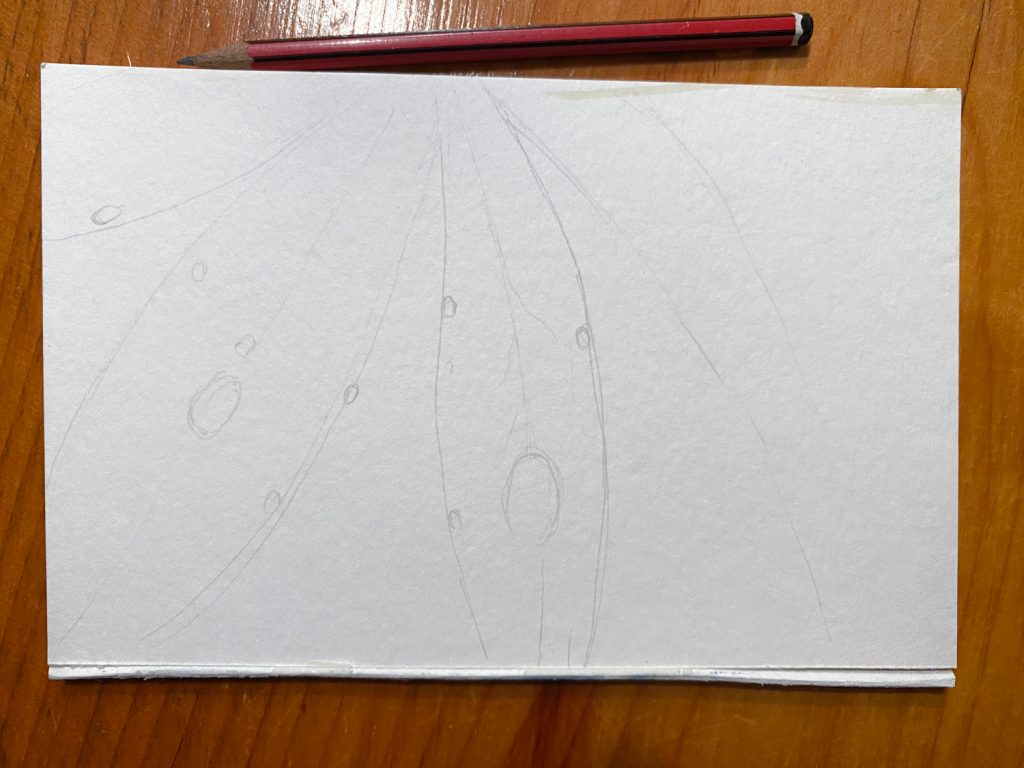
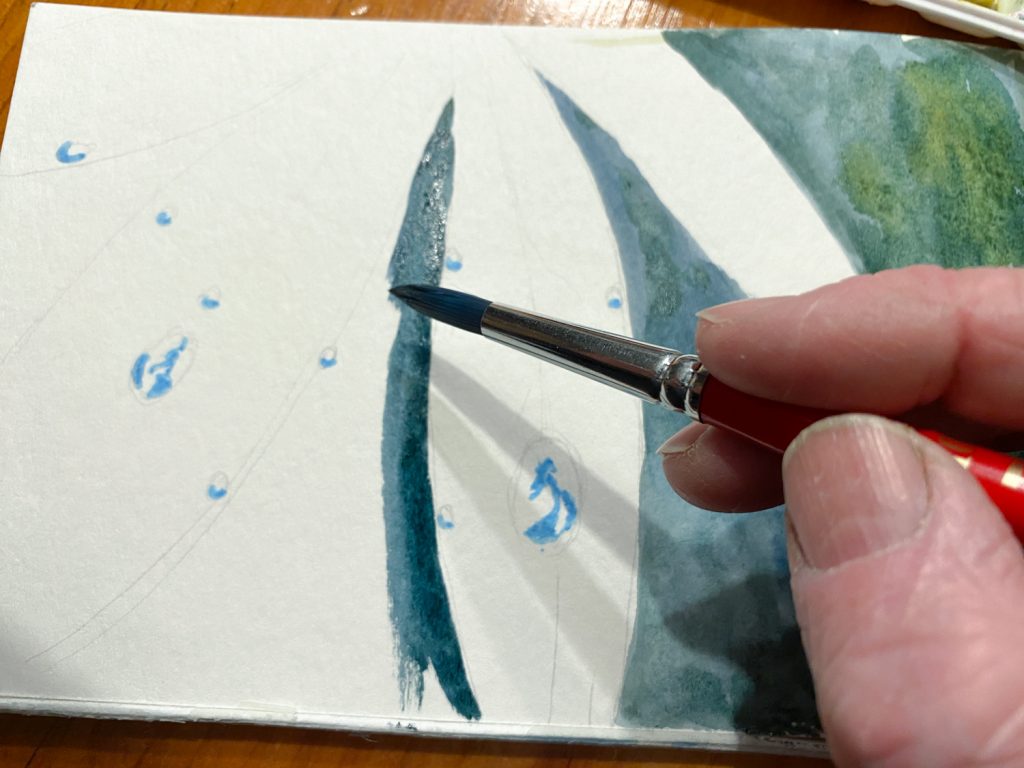
Alright, let’s get going. I’m going to be painting watercolor water droplets on a leaf like you’d see with early morning dew or after a rain shower. I’m going to outline all of my shapes lightly with a graphite pencil then apply the masking fluid.
There are a couple of ways you can ‘sell’ the fact that these are water droplets. One is to make a distinct outline and contrast to the shape. The cast shadow gives the droplet the illusion of dimension. The other is retaining or adding reflections on the surface. You’ll notice the reflections on the surface of this large droplet. Enlarged you can almost see my camera and tripod!

There are a couple of ways to get that bright white reflection that dots the surface of the droplet. If you’re a watercolor purist, you can use masking fluid to later reveal the white paper. The other method is to go back over the finished painting with a white gel pen or gouache. In this case, I used a masking pen which to be honest it would be better to use a brush on masking fluid. Because it’s so thin, I had trouble removing it in places and had to resort to scraping it with a knife blade.
I also used a white gel pen to really get the highlights, but that’s not neccessary – just helpful! If you’re a purist just skip that step.
The masking fluid goes on those little spots where the final reflections are. The fluid needs to dry completely – you can use a hair dryer on low setting or just let it air dry. While it’s drying I’m going to start working on the leaf background. Paint around the droplets so that you keep a lot of contrast. You can always go into each droplet and add more tone later.
Once the background is dry it’s time to start defining the drop. I’m using a darker, opaque color for the outline. I’ll add a little bit of a different mix for the shadow inside the droplet. With some of the color blend it in with a damp brush to keep that rounded shape and have the background color come through.

Let that dry a bit before moving on to the cast shadow. Keep in mind that shadows are usually darker and more defined the closer they are to the object and as they move out they blend more with the background and get softer.
The final step is to define the edges a little more and add some detail into the background. For the background behind the leaves I went with a warmer and darker color to contrast the cool green leaves. Some of those background details can be brought into the water droplet, refracting it slightly. Think about what reflections could be on the mirrored surface of the water drop.

Once it’s all dry I’m going to remove the masking fluid.
There! That completes the watercolor droplet painting. I hope you enjoyed this try it on your own! If you have some tips of your own for painting droplets in watercolor send me a message. I’d love to hear from you!